Wednesday, April 28, 2010

I like Aperture 3, but...

I've been playing with Apple Aperture 3 for the past two weeks and I can say it's a definite improvement over the previous versions. Faces, places, and brushes are the new features that I really like. Especially the edge-aware brushes, they seem to work very well. What's also noticeable over previous versions, is the speed; it's faster!

What I like:

Faces: It seems faster and a bit more accurate in detecting faces that are turned to the side over iPhoto '09.

Places: You can now import GPS tracks! If you own a GPS data logger, you'll be able to save a lot of time with this feature. If you own an iPhone (seems like everyone except me), you can even import GPS from iPhone photos. 

Third-party sites: Integration with sites such as Facebook is wonderful. This is a feature I wish Lightroom had. This feature on Aperture 3 is not the same as using a plug-in to export photos to a third party site on Lightroom. On Aperture 3, your photos are actually synced with these sites.


What I didn't like:

Speed: It's faster than the previous versions of Aperture, but it's still slightly slower than Lightroom. It is very noticeable if your photos are on an external drive such as a home server.

Camera Profiles: There are none! You can't choose anything. No camera profiles, no custom profiles.

Video: Not much to talk about here; the only thing you can do is trim.

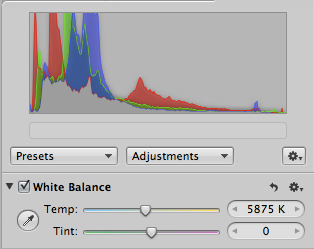
White Balance: I know this sounds a bit nitpicky, but it doesn't have pre-set white balance. It's not a big deal, but I just didn't like that it didn't have it. Oops...found it!
 

     Left: Adobe Lightroom 2
     Above: Aperture 3


Conclusions:

I know, two weeks with Aperture 3 isn't enough time to fully evaluate it. However, I'm basing my conclusions on my previous post, should I move from Lightroom 2 to Aperture 3? Well, the answer is I doubt that I'll convert. Aperture 3 is nice; I actually like it a lot. The way it integrates with software such as mail, iLife, or third-party sites is a dream. Faces, places, and brushes works very well. In terms of adjustments, I don't see any big differences between Lightroom and Aperture. However, the deal breaker for me is camera profiles. I use Colorchecker Passport to create custom profiles and without support for camera profiles, the Colorchecker Passport is only useful for white balance correction. If the price of Aperture 3 were a lot less, I would consider buying to use in place of iPhoto.

Now it's time to try the beta version of Lightroom 3. Looking at the new features, I don't think it will disappoint; especially with today's announcement that it'll also include lens correction.

Friday, April 16, 2010

I love Lightroom, but it's time to try Aperture 3


I’m a big fan of Adobe. When it comes to photography, Adobe Lightroom 2 and Photoshop CS4 are the two programs that I use most. I believe there’s really no competition out there, when it comes to PS. It has lots of filters from third parties. It can: stitch pictures to create a panorama (ridiculously slow, but capable), combine pictures to create an HDR image, or even create a time-lapse video. I primarily use PS to be creative with an image or create a time-lapse video. For pano, I use PTgui and for HDR, I use Photomatix.
Lately, I’ve been reading some good reviews about Aperture 3, and now I’m going to give it a try. However, I don’t know if $200 is worth it for these few reasons why I’m even considering this:
  • I like how Apple software integrates with one another.  (Mail, iMovie, iDVD, iPhoto)
  • It supports VIDEO!
  • Faces and places. I love these two features in iPhoto.
I did plan on waiting for LR3, but I imagine it won’t be out until at least July (Beta expires June 30, if that means anything). What I am going to do is download a trial of Aperture 3. I did try Aperture when it first came out and think it was bad, just that LR was better. If anyone has used both products, Aperture and Lightroom, and would like to share their thoughts, please do, I’d really appreciate it. Thanks

Friday, April 9, 2010

How to shoot a panoramic picture


Essential (in this case):
Nonessential, but would be nice to have:

If you’re serious about pano, then I would suggest that you use a tripod and a panoramic tripod head. You’ll have more options and better panoramas with these two items. With a panoramic head, two things that immediately come to mind: first, you’ll be able to eliminate parallax; second, you have the option to make different types of panoramas, including VR pano or “little planets”.

Camera Settings:
  • Set quality to RAW (if preferred)
    • I choose RAW because I want the most options available to me in post processing.
  • Choose a low ISO and, if applicable, make sure “AUTO ISO” is off.
    • This keeps noise out of the movie, and its exposure consistent.
  • Set your white balance
  • Set camera to “Manual”
    • Meter you main subject.
    • You’ll want the same aperture and shutter speed for all frames.
      • This keeps the movie’s exposure consistent.
      • This is very important where lighting may change (ex: sunrise or sunset).
      • If possible, choose an aperture with great depth of field.
  • Turn Auto focus off
    • You’ll want your focus point consistent in all exposures
Overlap images by at least 25%

Position your tripod and level your camera with the horizon. If you don’t level your camera, you may end up having to crop your image in post processing to level the horizon. If using a panoramic head, set you settings for your camera body and lens.  Now make sure that each exposure captured overlaps one another. I would suggest by at least 25%.  From here on it should be all post processing. The stitching software should do all the work.

Monday, April 5, 2010

View on the X-rite Colorchecker Passport

I was very hesitant to buy the X-rite Colorchecker Passport. It did seem like an expensive buy to spend $100 on a product to correct (profile) color. However, after using this product in various color temperatures, I must say that it is worth every penny and a must have item in your camera bag. I now get more accurate colors with my custom profile than with the default camera profile or adobe profile (I use Photoshop and Lightroom). Best of all, it's a real quick and simple process!

Here's an example with Auto White Balance and Adobe Standard Profile:

        Fluorescent Cool White 4100K              Metal Halide HID 4000K            High Press. Sodium HID 2100K
Pass mouse over image to see with custom WB and Profile using X-rite Colorchecker Passport 

The first step is I make sure my camera settings are correct:
 1. Set the quality to RAW. You won't be able to create a profile with JPEG.
 2. The lowest default ISO on my camera is 200. I'll make sure auto-ISO is off and set ISO to 200. What I'm trying to do is prevent chroma noise (at higher ISO) from affecting the profile I'm about to create.
 3. Finally, I'll set the white balance using the "White Balance Target". The reason why I set my white balance now, eventhough I shoot raw, is because I want the most accurate information possible on my camera's lcd, whether it's to preview a photo or check the histogram.

Next, I'll take a picture of the "Creative Enhancement Target" and "Classic Target". The most important thing in this step is that you will want a properly exposed image. You don't want to clip the highlights. If you do, the software will not be able to create a custom profile

The last step is using the software to create a custom profile. There are three choices, that I know of, to create a custom profile:
 1.
X-rite's Camera Calibration Software (desktop application)
 2.
X-rite's plugin for Adobe Lightroom
 3.
Adobe's DNG Profile Editor
The easiest process is to use the plugin for Lightroom. In Lightroom, you just have to right click on the picture of the "targets" and select EXPORT -> COLORCHECKER PASSPORT. Once it says it finished, just relaunch Lightroom and your custom profile should in the "Camera Calibration" pull down list. However, I prefer to use Adobe's DNG Profile Editor. Adobe's reds look more accurate and less saturated than X-rite's.

Thursday, April 1, 2010

White Macbook doesn't like me!

Look at what happened to my 13" Macbook. I cracked the screen and now I'm going to have to replace it. There goes $150 down the drain. Obviously, this one's my fault; I dropped it!
I've had such bad luck with the white Macbook. This one's actually my second one. When I bought my first Macbook (in 2006), I started getting a discoloration where the hand rests after a few weeks. Then came a battery problem.  Apple did replace both free of charge. Later, my hard disk failed, but at that time, Apple wouldn't acknowledge the problem andI ended up paying for a new HD.  Even though I've had my fair share of problems, I do love Apple products.